Survey Creation
To begin creating a survey, please click on "Design" which will navigate to the Design list page. Here you can manage and design Survey, Form and Quiz.
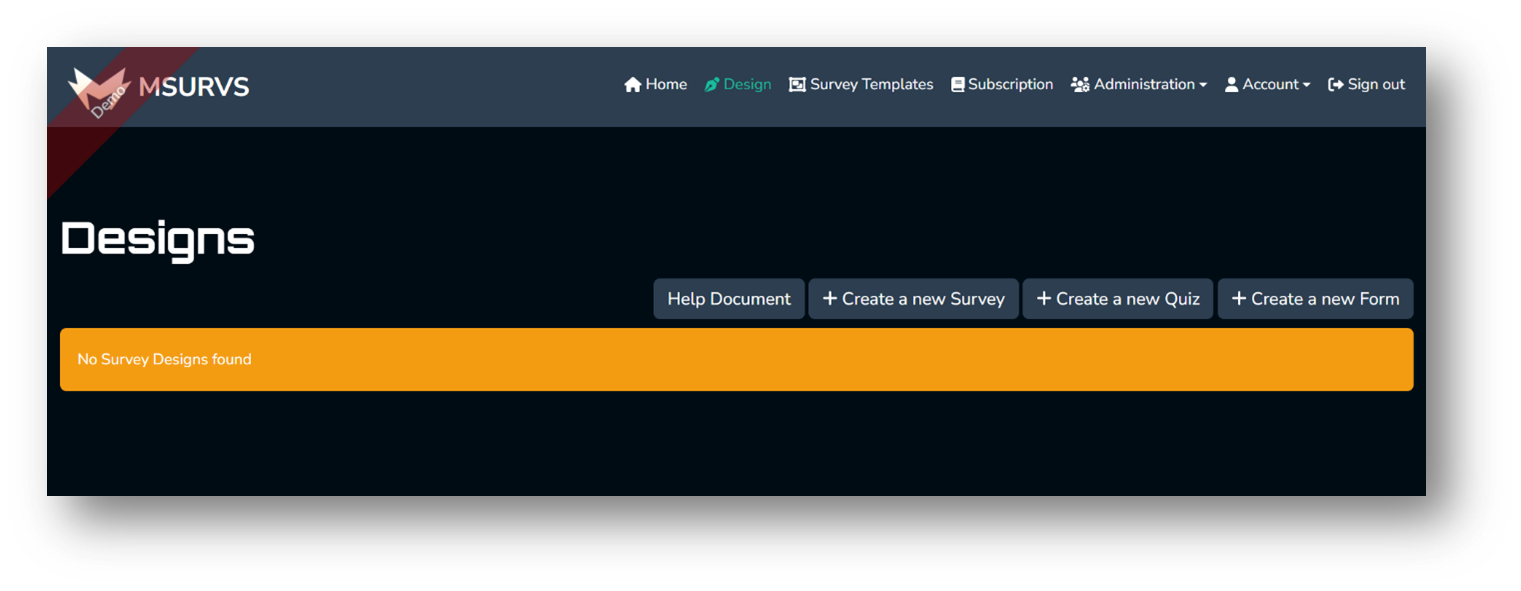
Click on ‘Create a new Survey’ to start creating a new survey design.
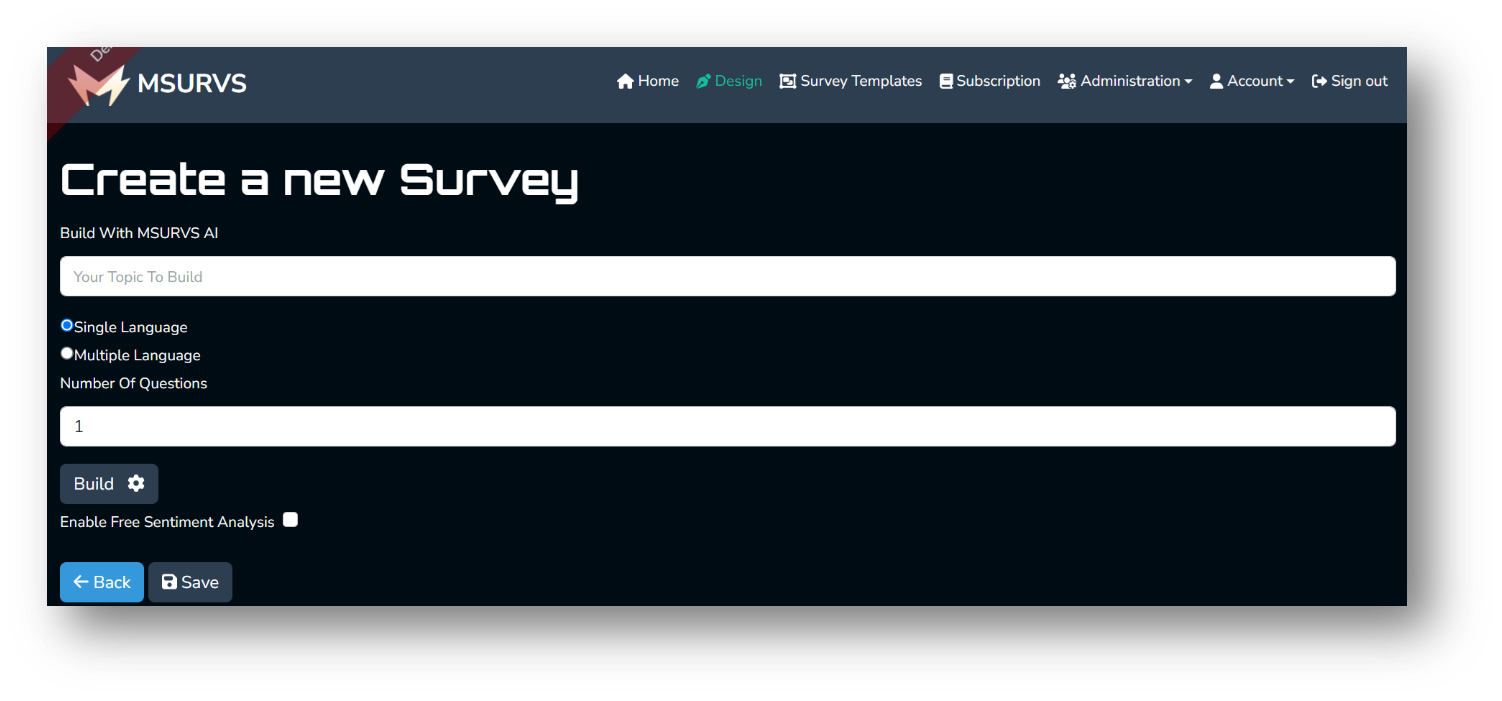
At the top left corner, within the 'Create a New Survey' section, you'll discover the feature 'Build with MSURVS AI’. This powerful tool allows you to craft surveys effortlessly. Simply input your desired survey topic and click 'Build’. In just moments, MSURVS AI will generate a customised survey tailored precisely to your specifications based on the prompt supplied. You also have the flexibility to adjust the number of survey questions to suit your needs. Below the 'Build' button, you'll encounter the option 'Enable Free Sentiment Analysis’. By opting for this feature, you grant the AI the capability to automatically analyse and interpret the sentiments conveyed by survey participants. While sentiment analysis may not be necessary for all surveys, this feature is provided as an optional tool, allowing you to make informed decisions based on respondent feedback. Once you have formulated your survey, kindly click on the 'Save' button to preserve your work. Following the saving process, you will be presented with the options depicted in the accompanying image.

Click 'Exit Editing' to come out of edit mode which will provide you with the option to publish the survey.

Once the survey is published, you will find a different options as displayed in the image below.

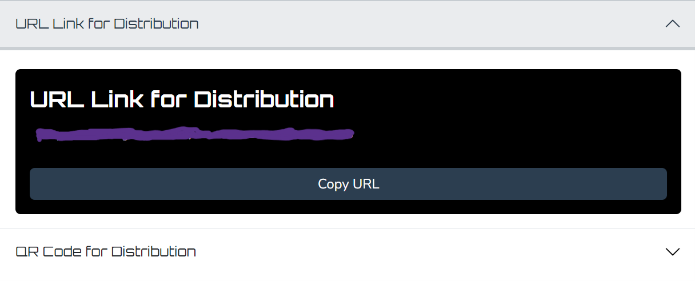
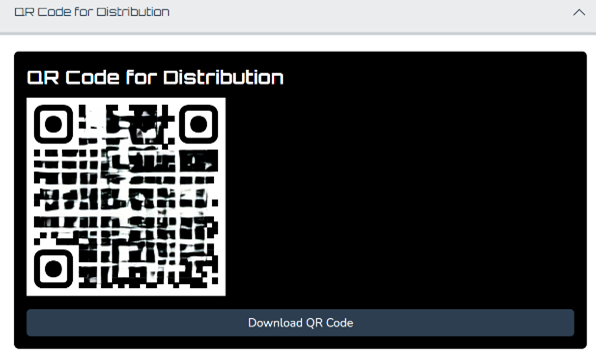
Distribute Survey: This feature allows you to find various ways by which the survey can be distrubuted to your target audience. You will have option for distributing 'survey distribution link', a QR code for the survey or Send invitation (Only available in Enterprise).
QR Code for distribution and scanning
Responses: This feature enables you to access and review all responses provided in the survey.
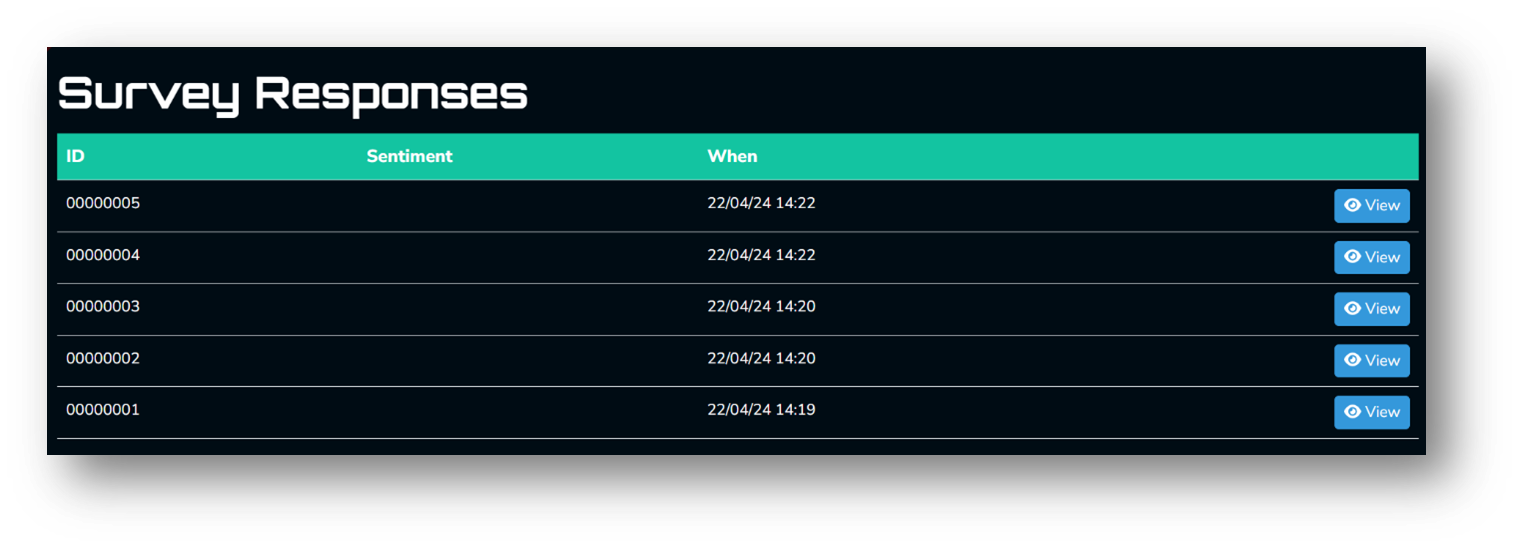
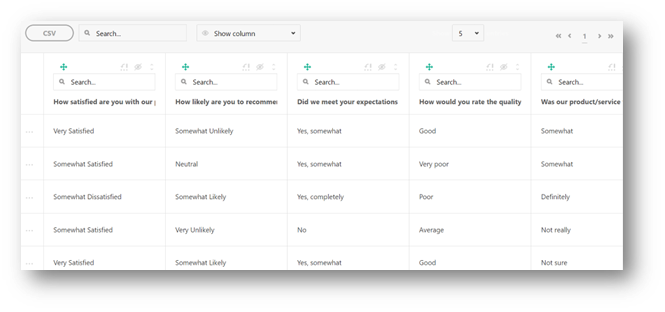
Please select 'View' to access individual responses. Once clicked, please scroll down to locate the 'Save as PDF' button in order to save the response in the PDF format on your local computer. Alternatively you can just view the response details. Data: In this feature, you have the option to view raw response data and download in CSV. You may store the datasheet on your device by selecting the ‘CSV’ button situated in the top-left corner.
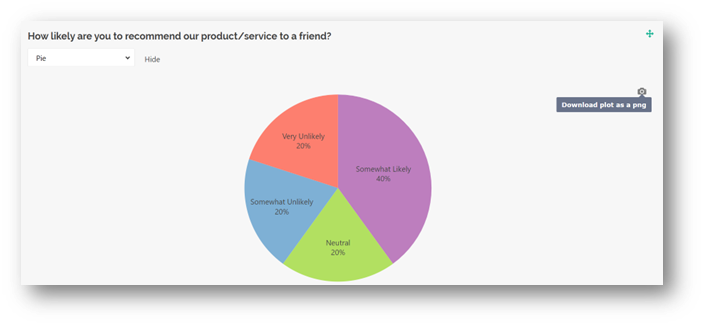
Visualise: In this option you can swiftly dissect survey responses, filter results, and transform raw data into visually stunning views and reports.
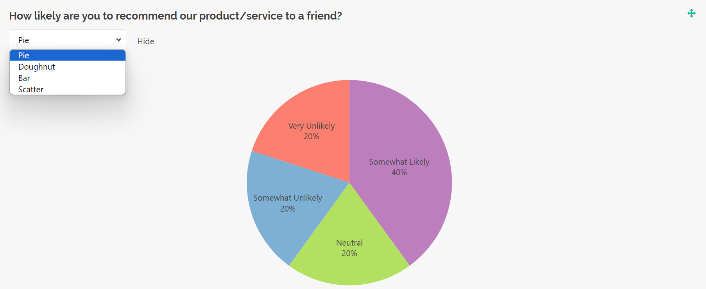
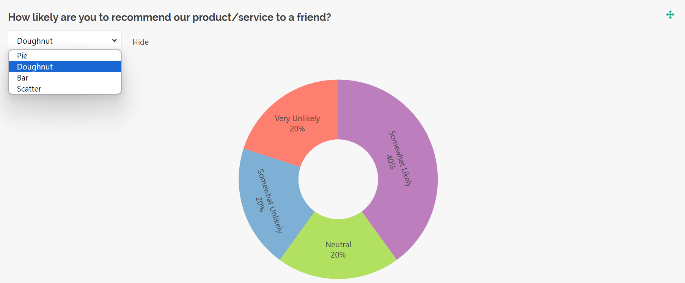
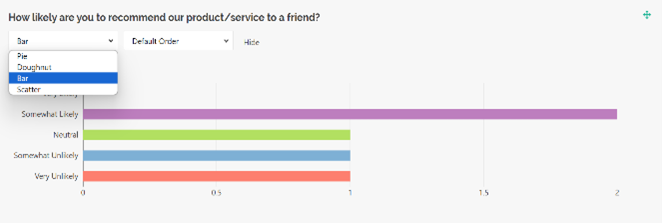
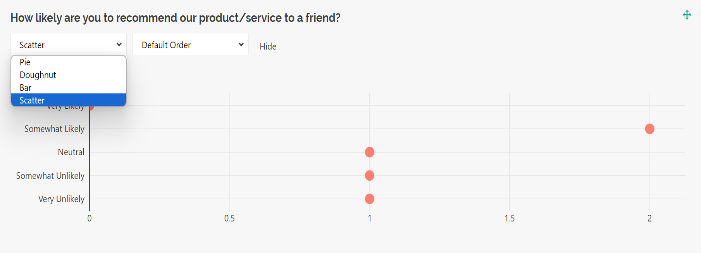
You have the option to save the charts to your device by hovering the cursor over the right-hand side of the chart displayed in the image below.
Stop Collection: Clicking this option will stop collecting further responses for your survey. Preview: This option allows you to preview your survey and you should be able to make a new copy of the survey as well. To edit the survey after its publication, click on ‘Stop collection’, proceed to select 'Edit Mode', followed by 'Edit'.

Upon completion of the editing of your survey, proceed to save the alterations by clicking on 'Save', subsequently click on 'Exit Editing' to come out of edit mode. Finally, resume the collection by selecting 'Restart Collection' to start collecting responses again. Click on ‘Delete’ to delete the survey permanently.
Note: If the survey design is edited after the survey is published and data is collected then there is a chance that the Visualise may get some issues because of the change of design as it may not be able to display the fields which are deleted from the design.